How to Make a DTF Gang Sheet in Canva (2026 Guide)
Jun 6, 2025 (Updated on Mar 12, 2026)
DTF Tutorials & How-To Guides
How to Make a DTF Gang Sheet in Canva (2026 Guide)
So you want to learn how to make a gang sheet in Canva — great idea. Building a Canva DTF gang sheet is one of the most accessible ways to prepare your designs for professional printing, and with the right settings it produces solid, print-ready results. The good news? You don't need to be a graphic designer to pull this off. Anyone can do it.
In this Canva gang sheet 2026 tutorial, we'll walk you through every step: how to set up your canvas correctly for gang sheet DTF Canva workflows, how to import and arrange your designs, what DPI to export at, and — importantly — which mistakes trip up most beginners. If you've already read our beginner's guide to what a gang sheet is, this is the hands-on follow-up. If that's your first time hearing the term, no worries — we'll cover the basics as we go.
Quick tip
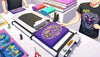
A gang sheet is simply a single large print sheet with multiple designs placed on it. Instead of ordering each design separately, you pack them together — which cuts your cost per design significantly. It's the most cost-effective way to print DTF transfers, and Canva makes building one surprisingly straightforward. This DTF gang sheet template Canva approach works on the free plan and takes about 15–20 minutes once you know the settings.
What You Need Before Starting
Before you open Canva and start dragging designs around, make sure you have a few things sorted. This saves a lot of frustration later.
- Your design files in PNG format with transparent backgrounds. This is non-negotiable for DTF printing. If your designs have white backgrounds, they will print with a white box around them — which is rarely what you want on a dark shirt. Need to remove backgrounds? Canva Pro has a built-in tool. For the free version, remove.bg works well.
- Designs at 300 DPI minimum. Low-resolution designs look fine on screen but will print blurry and pixelated. We'll cover how to check resolution below.
- A free Canva account (or Pro for background removal). The free plan handles everything you need for building a gang sheet. Canva Pro adds the background remover and a few other conveniences — but it's not required.
- Your finished, print-ready artwork. Canva is for layout, not for creating detailed designs from scratch. Have your artwork finalized before you start arranging your gang sheet.
One more thing worth mentioning upfront: Canva works in pixels by default, but DTF printers use inches. We'll walk you through exactly how to set units correctly so your sheet comes out the right size. And if you want to skip the manual layout entirely, we cover an easier option at the end of this guide.
Step 1: Set Up Your Canvas Size
Getting the canvas size right is the single most important step. If you set the wrong dimensions, your entire gang sheet will need to be rebuilt from scratch — so let's get it right the first time.
Step 1 of 5
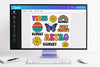
Create a custom-size design in Canva
Open Canva and click Create a design in the top right corner. Select Custom size. You'll see fields for width and height — but first, change the unit from px to in (inches) using the dropdown.
Now enter your dimensions. Here are the two standard sizes:
| Sheet Type | Width | Height (example) | Use For |
|---|---|---|---|
| Standard DTF | 22 inches | 24 or 36 inches | T-shirts, hoodies, apparel |
| UV DTF | 16 inches | 24 inches | Tumblers, glass, hard surfaces |
The 22-inch width for standard DTF reflects the standard roll width used by most professional DTF printers (including ours here at Zizo DTF). Going wider than 22 inches means your sheet won't fit the printable area — so don't adjust that width. Height is more flexible — just make it as tall as you need to fit your designs.
Common mistake
Setting canvas dimensions in pixels instead of inches. If you enter 2200 pixels at 72 DPI, that's only about 30 inches at 72 DPI — not what you want. Always switch to inches before entering your dimensions. Canva will handle the pixel conversion automatically.
Once your canvas is set up, you'll see a blank white workspace. Now — don't add a white background to this canvas. Leave it transparent. The white you see is just the Canva editor background, not part of your design.
Step 2: Import Your Designs
Step 2 of 5
Upload your PNG files
Click Uploads in the left sidebar, then click Upload files. Select all the PNG design files you want to include on this gang sheet. Canva will process them and they'll appear in your uploads panel.
Click each design to place it on the canvas. Once placed, you can resize, rotate, and reposition it freely.
A word on resolution
This is where a lot of people run into problems. Canva doesn't display DPI warnings, so you need to check your file resolution before uploading. Here's a quick way to think about it:
If your design will print at 4 inches wide, your PNG file needs to be at least 1,200 pixels wide (4 inches × 300 DPI = 1,200px). For a 10-inch-wide design, you need 3,000 pixels minimum. Use this formula whenever you're unsure:
DPI formula
Minimum pixel width = Print width (inches) × 300
Example: 6-inch design needs at least 1,800px wide source file.
If your source file is smaller than this, your print will come out soft and pixelated — no amount of upscaling in Canva fixes that. The issue needs to be fixed at the source file level. Check out our post on how to get high resolution designs for DTF printing if you're not sure where your artwork is coming from.
Also — formats matter. We accept PNG, JPEG, and TIFF for final gang sheet submissions. But for gang sheet building, always work with PNG files. JPEG introduces compression artifacts and eliminates transparency. Build your sheet in PNG, export in PNG.
Step 3: Arrange Designs on the Sheet
Step 3 of 5
Place and position each design
Click each uploaded design from your uploads panel to place it on the canvas. Drag it to your desired position. Use Canva's alignment guides — they snap to center and edges automatically, which helps you eyeball spacing consistently.
Resize any design by clicking and dragging the corner handles. Hold Shift while dragging to maintain proportions.
The goal here is simple: pack as many designs as possible without any of them touching each other. Think of it like a puzzle — the more efficiently you tile your designs, the lower your cost per transfer ends up being.
Sizing your designs correctly
This is also where you lock in the actual print size of each design. What you see in Canva is what will print — so if you want a design to print at 4 × 4 inches, size it to exactly 4 × 4 inches on your canvas. Canva's dimensions panel (top toolbar) shows exact width and height as you resize.
It helps to have a plan before you start placing. Know the target print size for each design and whether you need multiples of any of them. Duplicates are easy — right-click any design element on the canvas and select Duplicate. Great for when you need 10 copies of the same logo on a single sheet.
Pro tip
Turn on Canva's ruler by going to File > Show rulers and guides. This makes it much easier to verify actual inch measurements as you place designs — and helps catch sizing errors before export.
Step 4: Add Bleed and Spacing
Step 4 of 5
Leave 0.30 inch between every design
As you place each design, make sure there is at least 0.30 inch of clear space between designs — on all sides. Don't let designs touch or overlap. This spacing ensures clean cuts and prevents designs from interfering with each other during heat press application.
You don't need to add literal bleed marks or crop marks in Canva — that's handled on our end during production. What you do need to control is the gap between designs. The 0.30-inch rule is a firm minimum, not a guideline. You can leave more space if you prefer — that's fine. But don't go under 0.30 inches.
Why spacing matters
DTF gang sheets are cut down after printing. The cutting process needs clean margins to work accurately. If two designs are too close together, there's a real risk of one design's edge being clipped during cutting — which means a ruined transfer you can't use. The 0.30-inch gap is your safety zone.
Same rule applies to the outer edges of your canvas. Don't place designs right up against the canvas boundary. Leave at least 0.30 inches of clear space on all four sides of the sheet as well.
Do not do this
Do not overlap designs on your gang sheet — even slightly. Overlapping designs will cause print quality issues and may make transfers unusable. Every design needs its own clear space.
Already have your designs ready? Skip the setup and order your DTF gang sheet directly — no minimums, no setup fees.
Order Your Gang SheetStep 5: Export as PNG (300 DPI)
Step 5 of 5
Download your finished gang sheet
When your layout is complete, click Share in the top right corner, then select Download. In the download settings panel:
- File type: PNG
- Size: leave at default (Canva scales to the correct pixel count based on your canvas dimensions)
- If you have any transparent areas: check the Transparent background box
Click Download and save the file. That's your gang sheet — ready to upload for printing.
What about DPI — does Canva handle it automatically?
Canva exports at 96 DPI by default for its standard PNG export. This is a known limitation of the free Canva plan. Here's how to work around it:
Canva Pro users: When downloading, select PDF Print format and choose 300 DPI from the quality selector. Then convert the PDF to a high-resolution PNG using a tool like Adobe Acrobat, Photoshop, or a free converter like PDF2Go set to 300 DPI.
Free Canva users: The workaround is to design your canvas at a larger pixel size than you actually need — then the exported PNG will have enough pixel density for 300 DPI at your intended print size. For example: if your final print is 22 × 24 inches at 300 DPI, you would need a 6,600 × 7,200 pixel canvas. Canva allows custom pixel sizes — just enter those values instead of using inches. Then when you upload to your DTF printer, specify the correct 22 × 24 inch print size.
Format reminder
Never export a DTF gang sheet as JPEG. JPEG compression removes transparency and degrades image quality — both of which cause print problems. PNG is always the correct format. And never export as a Canva-specific format or SVG — stick with PNG.
And that's all! Once your PNG is downloaded, you've got a print-ready DTF gang sheet built in Canva. Upload it to your printer's file portal — or if you're ordering from us, upload it directly to your gang sheet order.
Common Canva Gang Sheet Mistakes to Avoid
We see these mistakes regularly — and every one of them results in a file that can't be printed as submitted. Check your gang sheet against this list before you upload anything.
-
Mistake 1
Wrong canvas size Using a 24-inch-wide canvas (or anything other than 22 inches) for a standard DTF gang sheet. The 22-inch width matches the standard DTF print roll. Anything wider gets cropped. Anything narrower wastes printable space.
-
Mistake 2
Low-resolution source files Uploading designs that are only 72 DPI or 150 DPI at their intended print size. Canva doesn't warn you — it just places the low-res image. The print will come out soft and pixelated. Check your pixel dimensions before uploading (see the DPI formula in Step 2).
-
Mistake 3
Overlapping designs Placing designs so they touch or overlap. Every design needs its own clear 0.30-inch buffer zone on all sides. Overlapping creates print errors that can't be fixed after the fact.
-
Mistake 4
Exporting as JPEG instead of PNG JPEG removes transparency and compresses your artwork in ways that affect color accuracy and edge sharpness. Always export as PNG. This is the most common mistake we see from first-time gang sheet submitters.
-
Mistake 5
Designs without transparent backgrounds If a design has a white background instead of a transparent one, that white box will print. On dark garments, it shows up as an obvious white rectangle around your design. Remove backgrounds before building your gang sheet — not after.
-
Mistake 6
Working in pixels without accounting for DPI Setting up a 2200 × 2400 pixel canvas without specifying the print size. At 96 DPI, 2200px = about 22.9 inches. At 300 DPI, 2200px = about 7.3 inches. The pixel count alone doesn't tell you anything — what matters is pixels per inch at the intended print size.
Feel free to save or bookmark this list — it's a solid preflight checklist for any gang sheet you build in Canva.
Alternative: Use the ZizoDTF Gang Sheet Builder
Canva works — but it requires some workarounds, especially around DPI and canvas units. If you want a faster path from designs to print, our online gang sheet builder handles a lot of this for you automatically.
Here at Zizo DTF, we built our gang sheet builder specifically for this workflow — you upload your PNG files, drag them into position, and the tool manages the dimensions, spacing, and file format. No unit conversion, no DPI math, no worrying about whether your export settings are right.
It's particularly useful if you're ordering regularly and want to save time on the setup. For one-off orders where you already have your designs prepped, Canva is a perfectly fine option — especially if you're comfortable with the steps above.
And if you're working with hard-surface branding instead of apparel — tumblers, phone cases, laptop lids — our UV DTF gang sheets follow the same process, just with a 16-inch canvas width in Canva. No heat press required on the application side, which is a nice bonus for a lot of customers.
New to Zizo DTF?
Not sure about quality before you commit to a full gang sheet order? We offer a free sample pack — try the print quality risk-free before placing your first order.
Ready to print?
Build Your Gang Sheet — No Minimums, No Setup Fees
Upload your PNG files and we handle the rest. US-based printing from Schaumburg, IL. Standard processing in 1–2 business days.
Order Your Gang SheetFrequently Asked Questions
What size should a DTF gang sheet be in Canva?
For standard DTF transfers, set your canvas to 22 inches wide. For UV DTF sheets, use 16 inches wide. Height can vary — most gang sheets range from 24 to 36 inches tall depending on how many designs you're fitting. Always work in inches, not pixels, to keep your DPI calculation accurate.
Do I need Canva Pro to make a gang sheet?
No — you don't need Canva Pro to build a basic gang sheet. The free version of Canva lets you create custom canvas sizes and upload your own designs. Canva Pro adds useful features like a one-click background remover, which helps — but it's not required if your designs already have transparent backgrounds prepared before you upload them.
Should I export my gang sheet as PNG or PDF?
Always export as PNG. PDF files can introduce color profile inconsistencies and don't always preserve transparency correctly for DTF printing. Export at 300 DPI minimum (see the DPI workarounds in Step 5 above). Never use JPEG — it removes transparency and applies lossy compression that degrades print quality.
How do I remove backgrounds in Canva?
Canva Pro includes a one-click background remover. Select your image on the canvas, click Edit image, then choose Background Remover. On the free plan, you'll need to remove backgrounds before uploading — free tools like remove.bg or Adobe Express work well for this step. Your designs must have transparent backgrounds before you build your gang sheet, not after.
Can I make a UV DTF sticker sheet in Canva too?
Yes — the process is nearly identical. The one key difference is your canvas width: use 16 inches wide instead of 22 inches. UV DTF gang sheets are printed on a different substrate designed for hard surfaces like tumblers, glass, and metal — no heat press required for application. Everything else — PNG format, 300 DPI minimum, 0.30-inch spacing between designs, transparent background — stays exactly the same.
Ready to Start Printing?
Building a DTF gang sheet in Canva is genuinely something anyone can learn — and once you've done it a couple of times, the whole process takes 15 to 20 minutes. The key rules are simple: 22-inch wide canvas, PNG files with transparent backgrounds, 300 DPI minimum resolution, and 0.30 inch between every design. Get those four things right and your file will be print-ready.
If you'd rather skip the setup entirely, our gang sheet builder is built for exactly this workflow — upload, arrange, order. No workarounds needed. And if you're still on the fence about quality, grab our free sample pack first — see the print quality in your hands before you place your first full order.
Feel free to experiment with different arrangements on your sheet — there's no one right way to pack a gang sheet. The more efficiently you tile your designs, the lower your cost per transfer ends up being. Happy printing.